Part 1: Installing and configuring the VTEX Headless CMS app
This tutorial is intended for those who started their FastStore project with the Store Components starter. If you started your project with the Base Store starter, please refer to this tutorial.
Introduction
Now that we are familiar with the core concepts of the VTEX Headless CMS, let's see how to install it in your VTEX account and configure it to link your FastStore project with the VTEX Headless CMS to present your Content Types and Sections.
The second step of this tutorial (Configuring the VTEX Headless CMS to test your local definitions) is optional but highly recommended. In this step, you'll learn how to expose your localhost so you can try the definitions of your Sections and Content Types locally before deploying the final version of your CMS settings.
Installing the VTEX Headless CMS app
In this step, you'll install the VTEX Headless CMS app and all its dependencies in your VTEX account.
- Open a new terminal window and log in to your VTEX account.
vtex login {accountName}
- Install the VTEX Headless CMS app and all its dependencies.
vtex install vtex.admin-cms@0.x vtex.cms-builder-sf-jamstack@1.x
(Optional) Configuring the VTEX Headless CMS to test your local definitions
By default, VTEX Headless CMS fetches the configurations from the deployed version of your store's website. However, if you prefer first to create and try the definitions of your Sections and Content Types locally, you can change this behavior by taking the following steps:
- Generate public URLs for your localhost.
- Create a workspace in your VTEX account that points the VTEX Headless CMS to your local server.
Generating public URLs for your localhost
In this step, we'll use ngrok - an application that exposes your local server ports to the internet - to generate a public URL for your FastStore project localhost.
- Install ngrok.
- Open the terminal and change to your FastStore project directory.
- Start a development server by running
yarn develop. - Open a new window of the terminal and run
ngrok http 8000to generate a public URL for your localhost.
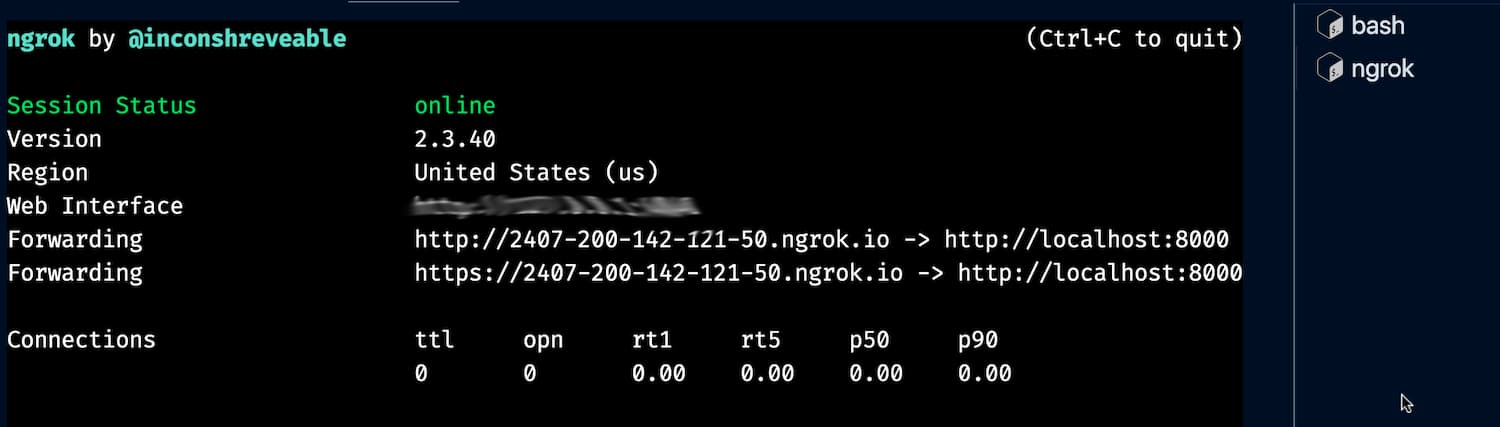
- Copy the Forwarding link and save it for later usage.
Configuring the VTEX Headless CMS app
In this step, we'll learn how to configure the VTEX Headless CMS app to use that ngrok URL to fetch your local definitions of Content Types and Sections.
- Open the terminal and log in to your VTEX account by running the following command:
vtex login {accountName}
Remember to replace the values between curly brackets according to your scenario.
- Create a new workspace:
vtex login {workspaceName}
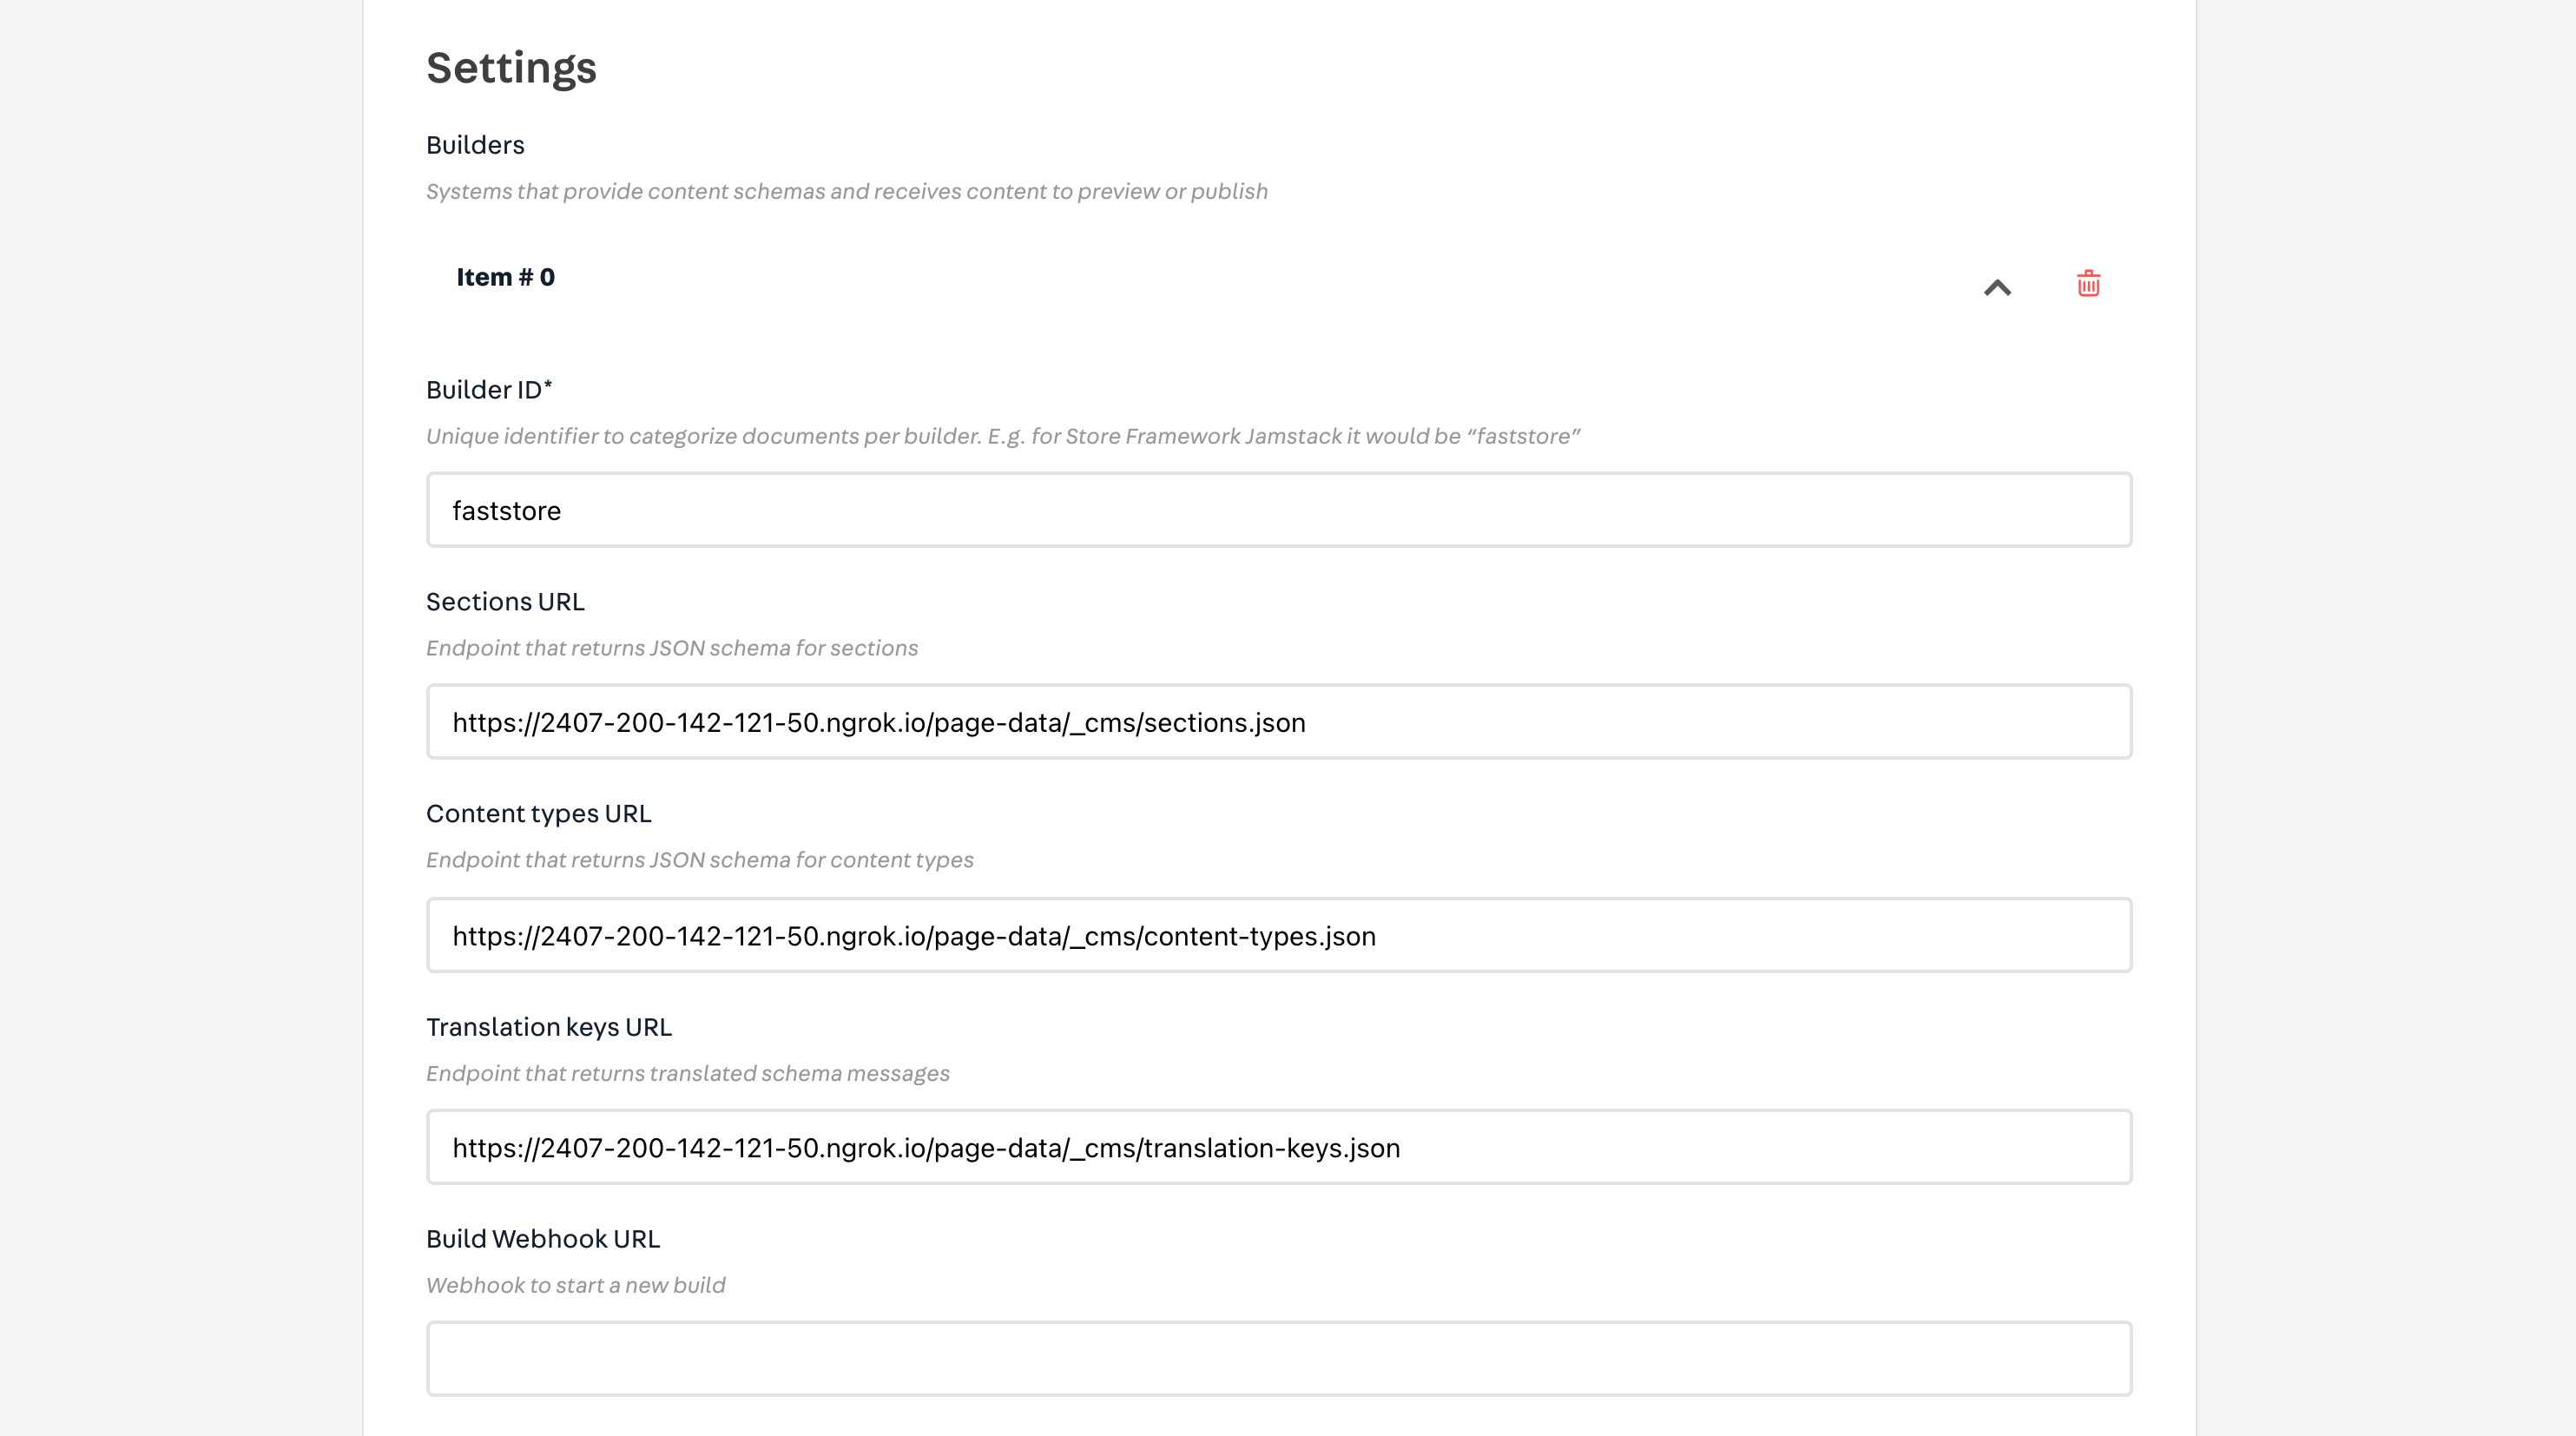
- Open the
admin-cms-graphql-rcSettings in the Admin of the workspace you just created:
https://{workspaceName}--{accountName}.myvtex.com/admin/apps/vtex.admin-cms-graphql-rc@0.x/setup/
- Select Add More.
- Fill in the Builder ID field with
faststore. - Fill in the following fields with the URL address generated by ngrok as in the following:
- Sections URL: {ngrokAddress}/page-data/_cms/sections.json
- Content types URL: {ngrokAddress}/page-data/_cms/content-types.json
- Translation keys URL: {ngrokAddress}/page-data/_cms/translation-keys.json
Later, once you start defining Content Types and Sections in your local project, you will be able to see your changes in this workspace at the VTEX Headless CMS app (CMS (alpha) > Pages (alpha)).
Please be aware that any change you make using the VTEX Headless CMS editor, even on a workspace, affects production. So make sure to use only drafts to check how your schema will look like in the CMS.