Handling the impact of third-party scripts
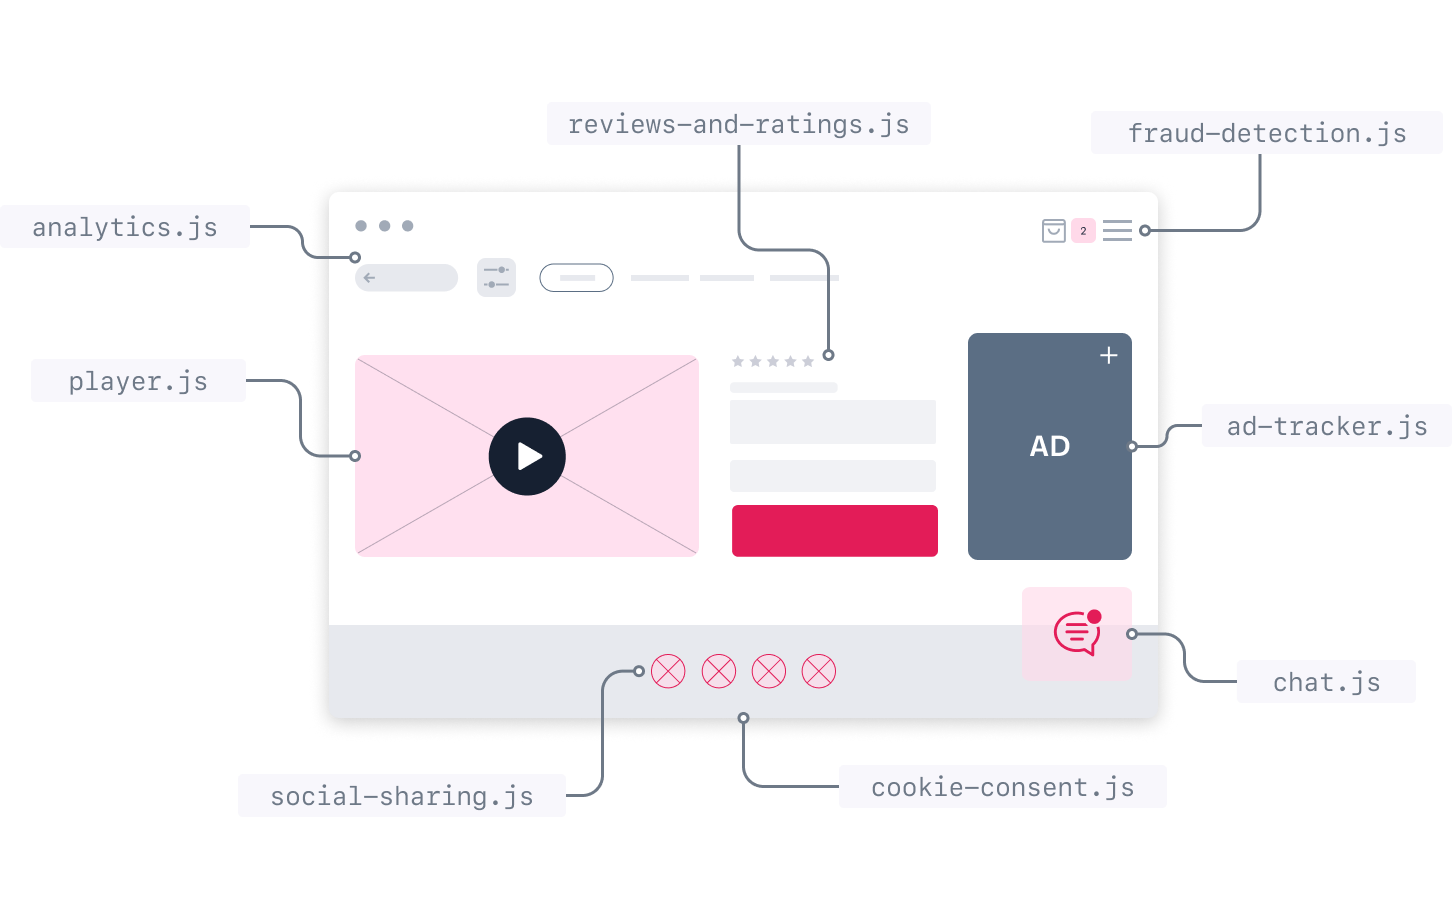
Third-party scripts often refer to elements embedded in a webpage and served by a domain different from the one being accessed. These scripts can include social sharing buttons, video player embeds, ads, analytics, and other scripts that make the web more dynamic and interactive.

Performance impact
Unfortunately, third-party scripts tend to slow down website performance significantly. Because they run on the main thread by default, these scripts are likely to block the main thread, preventing all other tasks from executing and delaying user interaction. Related issues include long execution times, slow server response, slow DNS lookup, server response errors, etc.
Dealing with third-party scripts
Still, some third-party scripts, such as the ones responsible for injecting analytics and processing payments, might be necessary. Hence, to preserve your website performance while not ultimately resigning from the functionalities provided by third-party scripts, we suggest considering the following:
- Review your third-party scripts and only keep the ones that are actually adding value to your website.
- Self-host the script if the third-party server is slow.
- Move third-party scripts into a Web Worker, i.e., a JavaScript that runs in the background and independently of other scripts.
In the following section, you'll learn how to move your essential third-party scripts into a Web Worker using Partytown.
"Partytown is a lazy-loaded library to help relocate resource intensive scripts into a web worker, and off of the main thread." Notice that Partytown is a beta project. Therefore, there are limitations and trade-offs, you should check before proceeding any further.

Step by step
In the following step by step, you'll learn how to use Partytown and organize your third-party scripts. We will use the Google Tag Manager script as an example.
Notice that if you quick started your FastStore project from one of our official Starters, the Google Tag Manager script is already set up.
Step 1 - Installing Partytown
- Open your FastStore project in any code editor of your preference.
- Install Partytown.
yarn add @builder.io/partytown
Step 2 - Defining and exporting third-party scripts
- Declare your key-value configurations (e.g., the GTM container ID) in the
store.config.jsfile as in the following:store.config.js<...>
analytics: {
// https://developers.google.com/tag-platform/tag-manager/web#standard_web_page_installation,
gtmContainerId: 'GTM-XXXXXX',
},
<...> - Create a folder named
ThirdPartyScriptsinsidesrc/components. Use this folder to organize and save all third-party scripts you want to run on your website. - Create the
GoogleTagManager.tsxfile insidesrc/components/ThirdPartyScriptsand declare the Google Tag Manager script as in the following:src/components/ThirdPartyScripts/GoogleTagManager.tsxinterface Props {
containerId: string
dataLayerName?: string
}
const GTM_DEBUG_QUERY_STRING = 'gtm_debug'
/* Google Tag Manager script adapted to be executed only when necessary, according to https://developers.google.com/tag-manager/quickstart*/
const useSnippet = (opts: Props & { partytownScript: boolean }) => `${
opts.partytownScript ? '!' : ''
}window.location.search.includes('${GTM_DEBUG_QUERY_STRING}=')&&
(function(w,d,s,l,i){w[l]=w[l]||[];w[l].push({'gtm.start':
new Date().getTime(),event:'gtm.js'});var f=d.getElementsByTagName(s)[0],
j=d.createElement(s),dl=l!='dataLayer'?'&l='+l:'';j.async=true;j.src=
'https://www.googletagmanager.com/gtm.js?id='+i+dl;f.parentNode.insertBefore(j,f);
})(window,document,'script',${JSON.stringify(
opts.dataLayerName ?? 'dataLayer'
)},${JSON.stringify(opts.containerId)});`
function GoogleTagManager(props: Props) {
return (
<>
/*Adds GoogleTagManager script to Partytown.*/
<script
key="gtm.partytown"
type="text/partytown"
dangerouslySetInnerHTML={{
__html: useSnippet({
...props,
partytownScript: true,
}),
}}
/>
/*Adds GoogleTagManager script to the page, using GTM_DEBUG_QUERY_STRING for debugging reasons.*/
<script
key="gtm"
type="text/javascript"
dangerouslySetInnerHTML={{
__html: useSnippet({
...props,
partytownScript: false,
}),
}}
/>
</>
)
}
export default GoogleTagManager
Step 3 - Injecting the scripts into Partytown
-
Create the
ThirdPartyScripts.tsxfile insidesrc/components/ThirdPartyScripts. Use this file to inject your scripts into the<Partytown/>component. -
Import the
<Partytown/>component from the@builder.io/partytown/reactsubmodule, your scripts (e.g., theGoogleTagManagerscript) and your configurations fromstore.config.js.src/components/ThirdPartyScripts/ThirdPartyScripts.tsximport React from 'react'
import { Partytown } from '@builder.io/partytown/react'
import storeConfig from '../../../store.config'
import GoogleTagManager from './GoogleTagManager' -
Declare all the necessary variables related to the script and handle the case of a missing configuration (e.g., no GTM container ID).
src/components/ThirdPartyScripts/ThirdPartyScripts.tsxconst isString = (obj: unknown): obj is string => typeof obj === 'string'
const gtmContainerId = storeConfig.analytics?.gtmContainerId /*The GTM Container ID specified in the store.config.js file*/
const includeGTM = typeof gtmContainerId === 'string'
if (process.env.NODE_ENV === 'development' && !includeGTM) {
console.warn(
'No GTM container id found. Check the analytics section on your store.config.js file for enhanced observability of your store.'
)
} -
Set up a function named
ThirdPartyScriptsthat runs the<Partytown/>component and use theforwardattribute to inject your scripts. Set up the other attributes (debug,lib,loadScriptsOnMainThread, andresolveUrl) according to your scenario. Please refer to Partytown documentation for more information.src/components/ThirdPartyScripts/ThirdPartyScripts.tsxfunction ThirdyPartyScripts() {
return (
<>
{includeGTM && <GoogleTagManager containerId={gtmContainerId} />}
<Partytown
key="partytown"
forward={[ /* Variables to forward from main to worker. See https://partytown.builder.io/configuration for more information */
includeGTM && 'dataLayer.push',
].filter(isString)}
/>
</>
)
}
export default ThirdyPartyScripts
For additional examples, please refer to our Official Starters implementations (Next.js/Gatsby).
Step 4 - Running the ThirdyPartyScripts function
- Import and run the
ThirdyPartyScriptsfunction in your page'sHeadas in the following. For Next.js projects, use thesrc/pages/_document.tsxfile. For Gatsby projects, use thegatsby-ssr.tsxfile.
- Next.js
- Gatsby
   import { Head, Html, Main, NextScript } from 'next/document'

   import WebFonts from 'src/fonts/WebFonts'
+  import ThirdPartyScripts from 'src/components/ThirdPartyScripts'
   import storeConfig from 'store.config'

   function Document() {
     return (
       <Html>
         <Head>
+          <ThirdPartyScripts />
           <WebFonts />
         </Head>
         <body className={storeConfig.theme}>
           <Main />
           <NextScript />
         </body>
       </Html>
     )
   }

export default Document
	import type { GatsbySSR } from 'gatsby'

+ 	import ThirdPartyScripts from './src/components/ThirdPartyScripts'

	<...>

	export const onRenderBody: GatsbySSR['onRenderBody'] = ({
		setHeadComponents,
		setBodyAttributes,
	}) => {
+		setHeadComponents([<ThirdPartyScripts key="ThirdPartyScripts" />])
		setBodyAttributes({
			className: storeConfig.theme,
		})
	}