Part 3: Understanding the project structure
Find out how to organize your FastStore + Gatsby project and get to know our recommended conventions for naming files and folders.
/
├── /.cache
├── /.github
├── /.husky
├── /@generated
├── /cypress
├── /node_modules
├── /public
└── /src
    ├── /api
    ├── /components
    ├── /fonts
    ├── /images
    ├── /pages
    ├── /sdk
    ├── /server
    ├── /styles
    ├── /typings
    ├── constants.ts
    ├── Layout.tsx
├── /static
├── .editorconfig
├── .eslintignore
├── .eslintirc
├── .gitignore
├── .prettierignore
├── .prettierrrc
├── .styleignore
├── CHANGELOG.md
├── codegen.yml
├── cypress.json
├── gatsby-browser.js
├── gatsby-config.js
├── gatsby-node.js
├── gatsby-ssr.js
├── LICENSE
├── lighthouserc.js
├── package.json
├── postcss.config.js
├── pull_request_template.md
├── README.md
├── renovate.json
├── store.config.js
├── stylelint.config.js
├── tsconfig.json
├── vtex.env
└── yarn.lock
Overview
In the previous sections of this tutorial, you started your first FastStore + Gatsby store and learned how to run a local server. Now it's time to understand how our project is structured.
Since Gatsby is an opinionated front-end framework, it comes with pre‑defined conventions for naming files and folders. These conventions are helpful to facilitate our work as web developers. So, take your time to learn some of them and get the big-picture of how an FastStore + Gatsby project is structured.
Let's start taking a look at the structure to the right that represents the source code of our mystore.store project.
Notice that some of these folders, such as node_modules and public, might be familiar to you. Others, however, are VTEX and Gatsby-specific and might be new to you. Let's investigate them.
Basic files and folders
node_modules
The node_modules folder is where npm saves and installs all packages your project depends on into your local files. As we recall, the node_modules folder is common to all projects created with npm, and since Gatsby is Javascript-powered, so is our project.
package.json and package.jsonfiles
Similar to the node_modules folder, the package.json and package‑lock.json files are vital to any JavaScript/Node project. They record all the metadata npm needs to identify the project and handle its dependencies and scripts.
cache and public
The cache and public folders are automatically generated by Gatsby when you build your website. They are used to expose the output assets created during the development and building processes. It's important to know that the cache folder stores an internal cache and that the public folder is where the production‑ready version of your website lives. Remember that these two folders are not meant for modification and should be added to .gitignore.
Configuration files
You'll notice some VTEX and Gatsby-specific files responsible for your project settings at the root of your project:
store.config.js- Configures environment variables to connect to your VTEX account.gatsby‑browser.js- Changes the browser behavior and allows wrapping components around all your store pages.gatsby‑config.js- Sets up your site metadata.gatsby‑node.js- Runs Javascript code during build.gatsby‑ssr.js- Customizes server-side rendering settings.
store.config.js
The store.config.js file stores the environment variables needed for accessing your VTEX account, such as your VTEX account name. This files also includes some configurations related to other apps used in your store, such as Lighthouse and Google Tag Manager.
gatsby‑browser.js
The gatsby‑browser file allows you to use the Gatsby Browser API. You can use it to change and customize Gatsby's behavior in the browser and make components wrap around all your web pages. For example, you can use it to import global CSS styles and render components that are common to all your store pages.

gatsby‑config.js
The gatsby‑config file allows you to use the Gatsby Config API. It is the main configuration file in a Gatsby website. You can use it to specify your site metadata and configure Gatsby Plugins.

If you're not familiar with Gatsby Plugins, don't worry. In the following sections, we'll explore how to add new functionalities to your store website using Gatsby plugins.
gatsby‑node.js
The gatsby‑node.js file is where you'll define and configure Gatsby Node APIs. The code within this file runs once during the build process of your site, allowing you to customize and extend the Gatsby settings that affect the build.

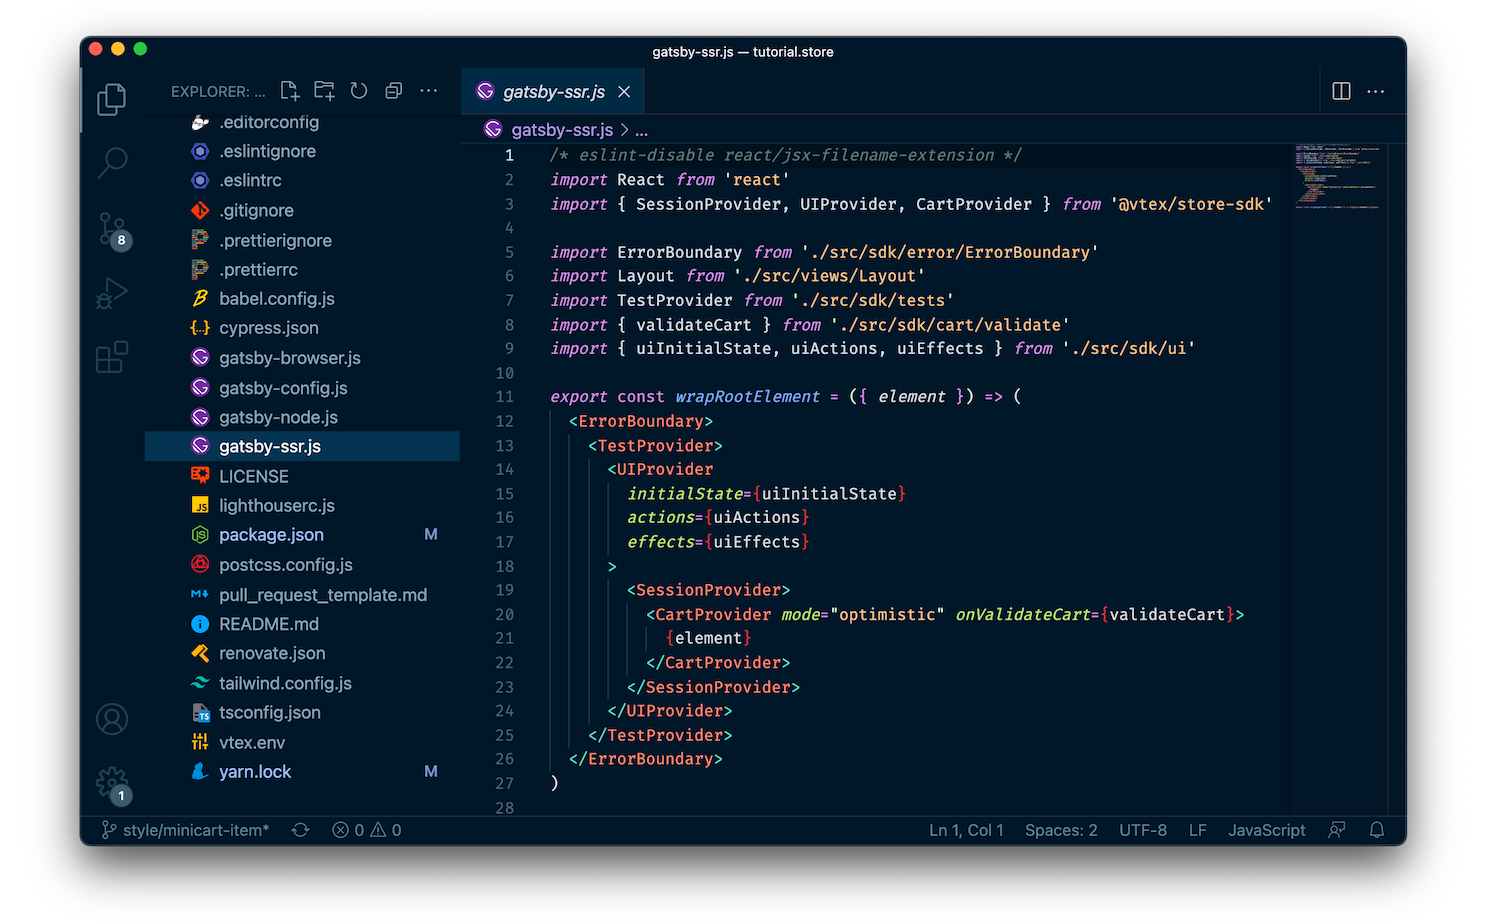
gatsby‑ssr.js
The gatsby‑ssr.js file allows you to use the Gatsby Server Rendering APIs. These enable customizing the content of static HTML files as they are Server-Side Rendered (SSR) by Gatsby and Node.js.
The src folder
Now that you recognize your projects' most essential folders and files, let's explore the src folder. The src folder contains the source code that makes up your store website. It is where you'll store all the code related to what you see on your store frontend, such as texts and images. In other words, it's where we'll actually develop our React components and storefront.
To keep the source code well-organized, we adopted the Model-view-controller architecture, splitting the code into several subfolders as presented in the following:
-
Model - The Model handles data fetching and manages data structure. Since this project uses Jamstack, we split where static and dynamic data are fetched.
pages- Used to automatically generate URL routes corresponding to the files created within this folder. It is also where you'll fetch static data.views- Used to create the frontend content of a specific page by bringing together static data frompages, reusable components fromcomponents, and new dynamic attributes.
-
View - The View creates your website's Look and Feel, determining how the user will see and interact with it.
components- Used to store reusable React components.
-
Controller - The Controller is responsible for updating the Model and View layers in response to user requests.
sdk- Used to store hooks and logical pieces of code.
Remember that, because Gatsby is a React‑based framework, our main task will be to use, style, and create components that compose our storefront. Hence, everything inside the src folder, including pages, will be mostly React components. You will then find many .tsx files within this folder, which is the file format used by React to produce React components. .tsx stands for TypeScript XML, indicating the mix of TypeScript syntax with HTML. In other words, .tsx is a TypeScript syntax extension that allows us to write HTML‑like syntax within React components.
pages
The pages folder works as a URL router for your website. In practice, this means every component created inside the pages folder automatically becomes a web page with a path based on its file name. For example, if you create a page component called abouts.tsx, you will then be able to navigate to /about and check the content of that page.
This is also where you'll fetch static data, such as your store metadata.
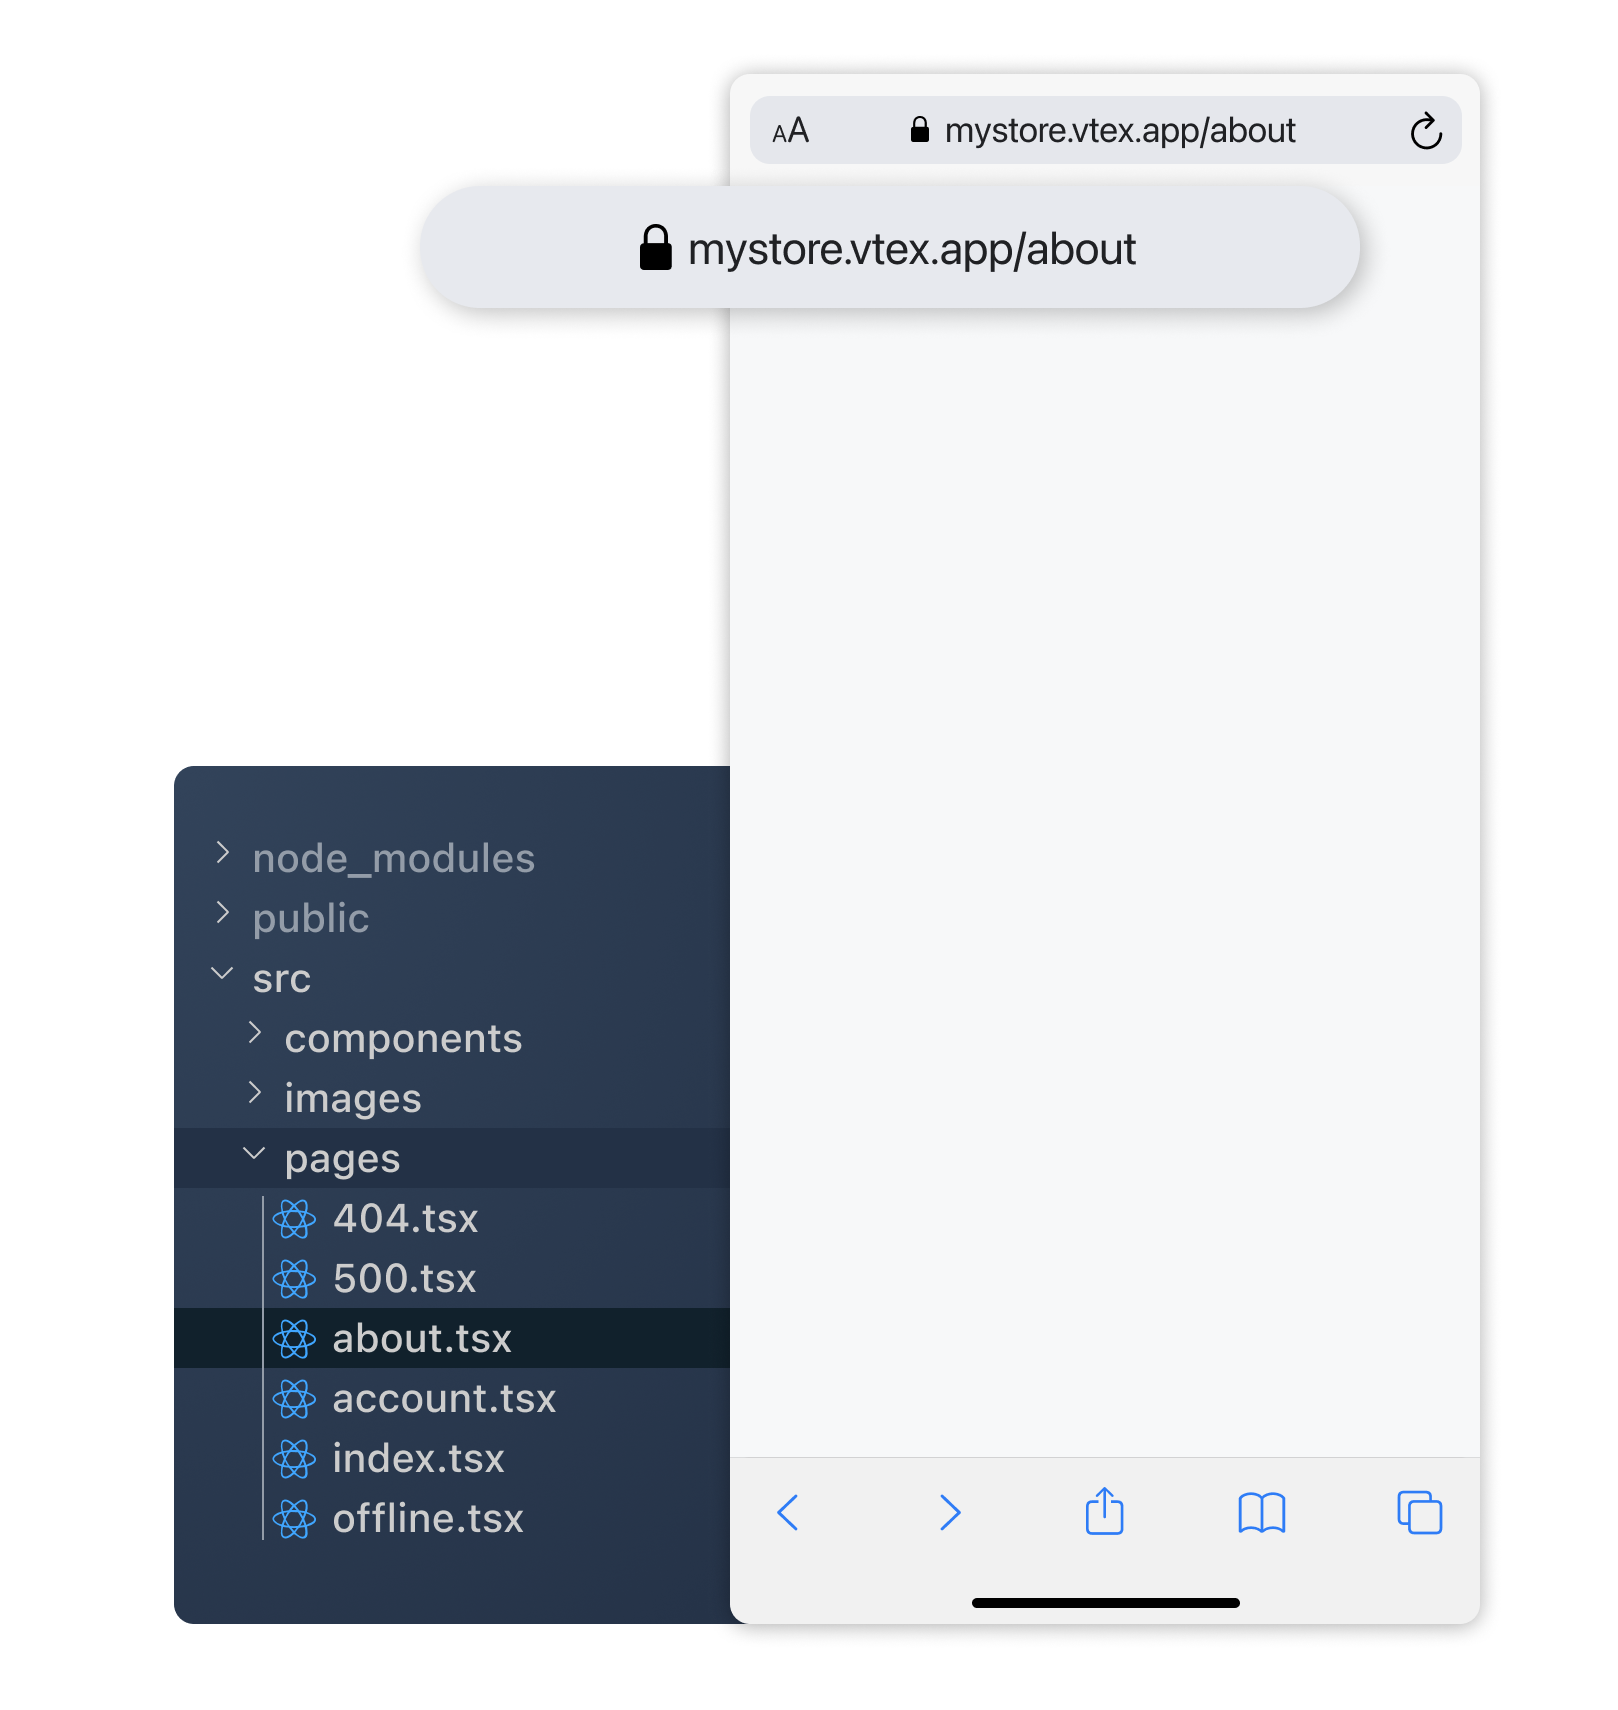
Within this folder, you'll already find some pre-defined subfolders and files, such as:
index.tsx- Responsible for making your store's homepage available.{StoreCollection.slug}/[...].tsx- Responsible for making Collection pages available at https://mystore.vtex.app/{collectionName}.s/[...].tsx- Responsible for making Search Result pages available at https://mystore.vtex.app/s/{searchString}?map=term.{StoreProduct.slug}/p.tsx- Responsible for making static Product pages available at https://mystore.vtex.app/{productSlug}/p.[slug]/p.tsx- Responsible for making client-only routes available at https://mystore.vtex.app/{productSlug}/p for dynamic Product pages, i.e., pages whose content isn't available at build time and is fetched on the client side.
Learn more about client-only routes here.
components
As the name suggests, the components folder is where you'll store all your reusable React components, such as the Product component illustrated in the following image. The components declared within this folder are supposed to be added to a page component and, together, make up the different parts of the UI.
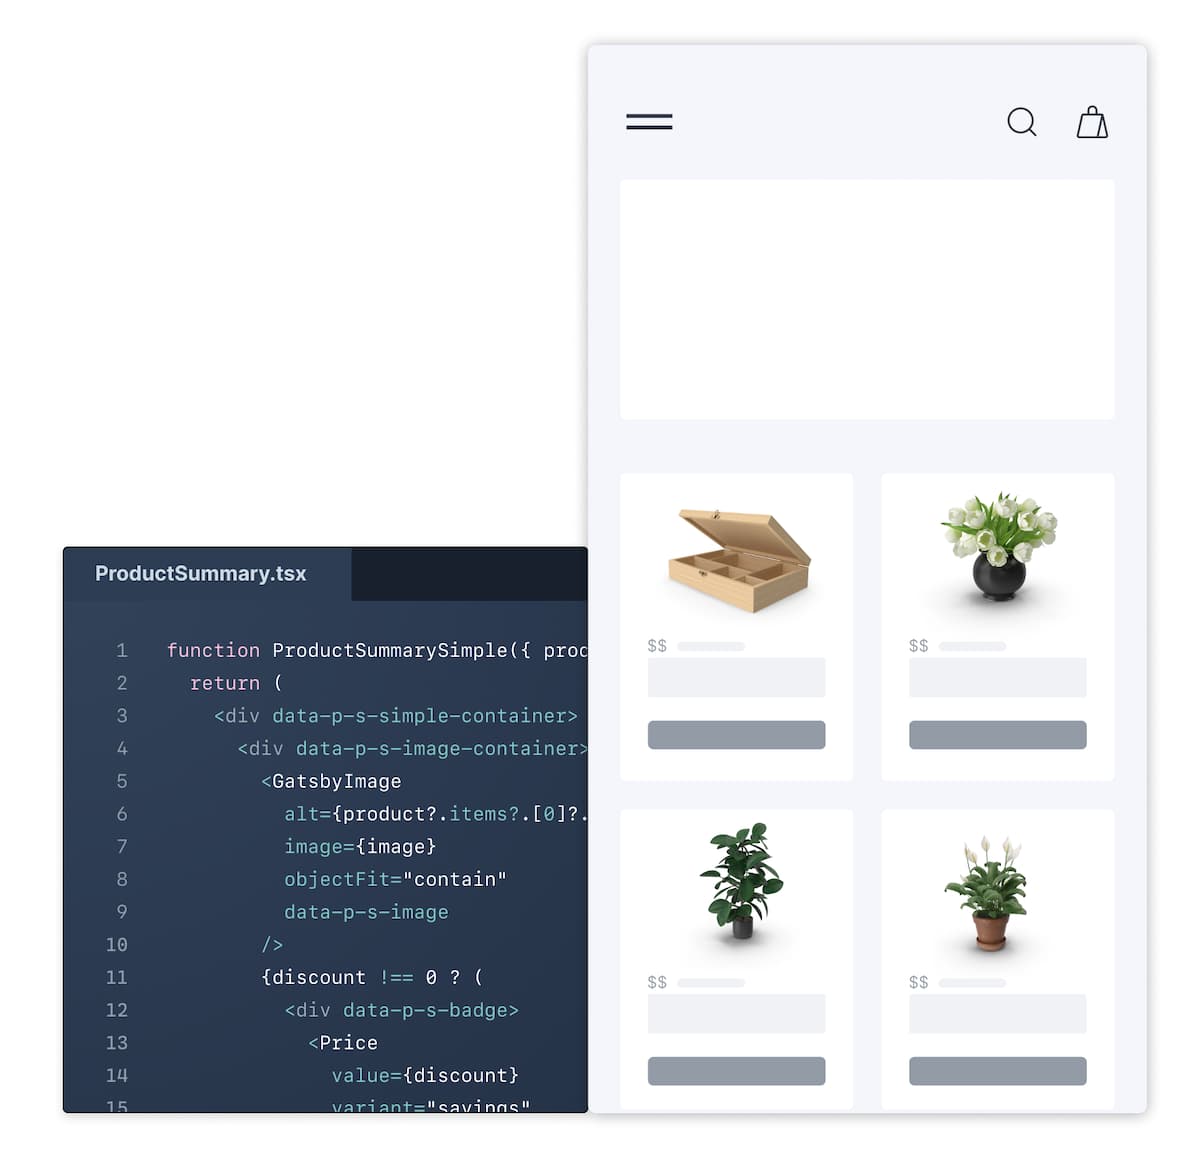
Notice that these components are non-routable, i.e., they are not web pages by themselves. For example, it's not possible to navigate to the Product component.
Also, since you may have numerous reusable components in your project, we recommend as a good practice that you organize this folder using domain-specific subfolders. For example, in the Base store, you will find:
cart- Contains cart-related components, such as a menu cart.common- Contains components that are common to multiple pages, such as footer and navbar.product- Contains product-related components, such as product summary.search- Contains search-related components, such as facets.sections- Contains components that occupy a whole section of a web page and that are usually desirable to be changed by a CMS, such as carousels.ui- Contains basic building blocks, such as buttons, checkboxes, and modals.
views
The views folder provides a functional storefront page by bringing together static data from pages, reusable components from components, and dynamic data. Ideally, you should use components within the components/sections folder for easier integration with CMS.
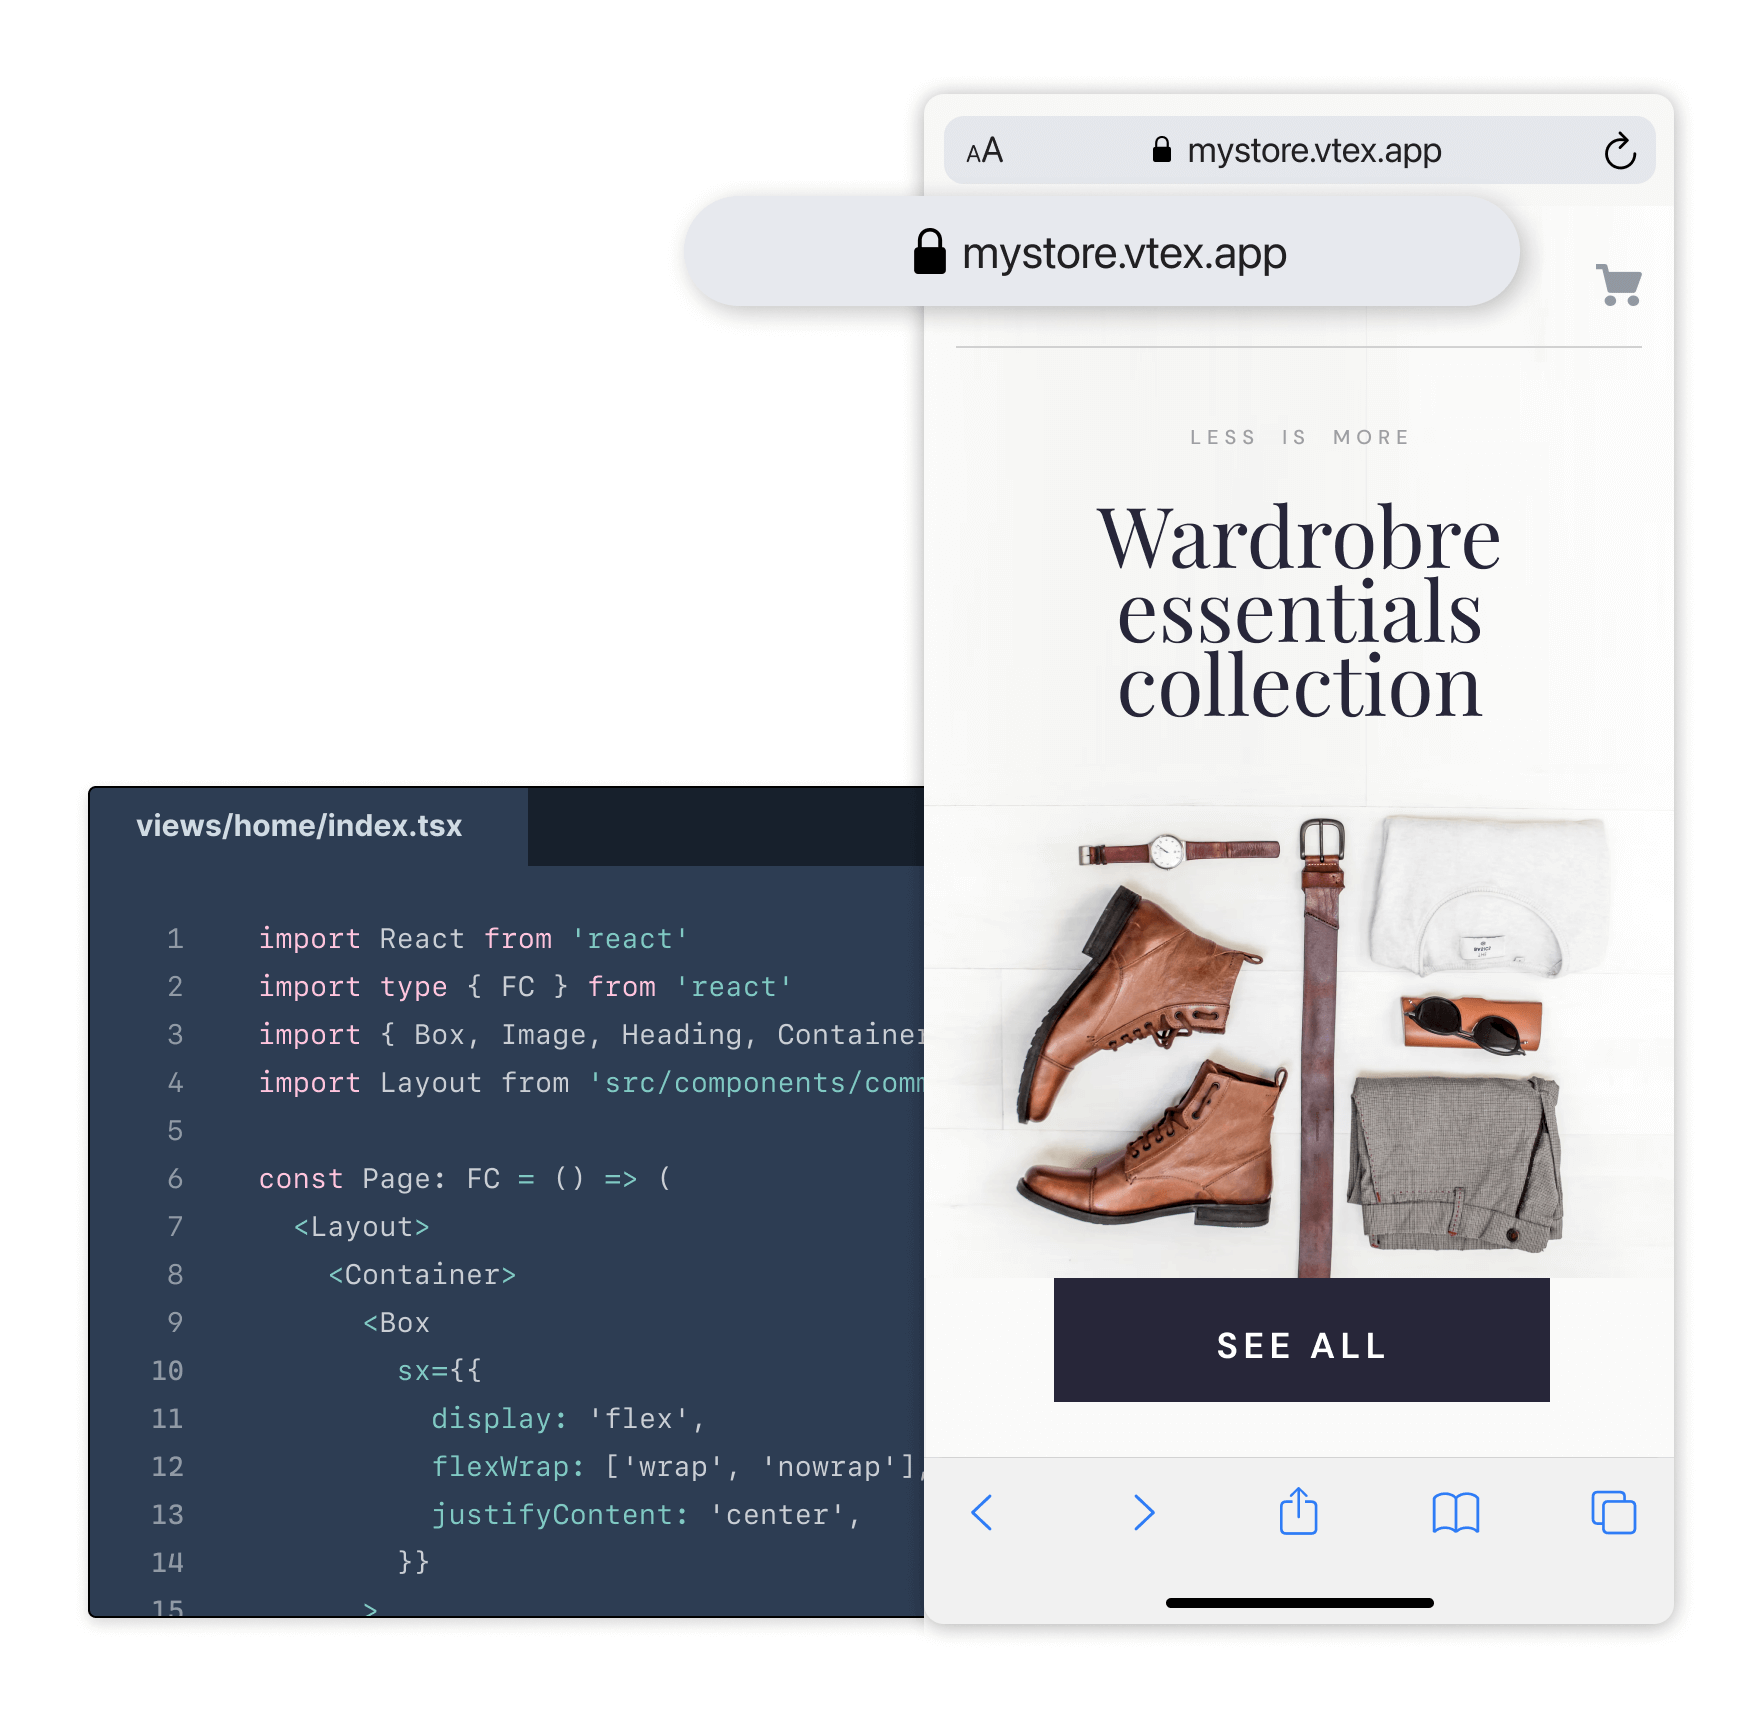
Within the views folder, you'll find the Layout.tsx file and page-specific subfolders, such as collection, home, product, and search.
Page-specific subfolders
Each of these folders (collection, home, product, and search) present the following structure:
Seo- Exports SEO tags for that specific page.hooks- Fetches, validates, and updates static data with dynamic attributes.index.tsx- Returns React components along with SEO tags, using the definitions withinSeoandhooks.
To see the Views content rendered, you must first import it into its corresponding pages file. For example, in the pages/index.tsx, import the corresponding home view (e.g. import View from 'src/views/home') and render it correspondingly (e.g., function Page(props: Props) {return <View {...props} />}).
Layout.tsx
Within the views folder, you'll also find the Layout.tsx file. This file contains React layouts and functionalities common to multiple pages of your website, such as the Navbar and Footer. This file is imported into both the gatsby-ssr.js and gatsby-browser.js files.
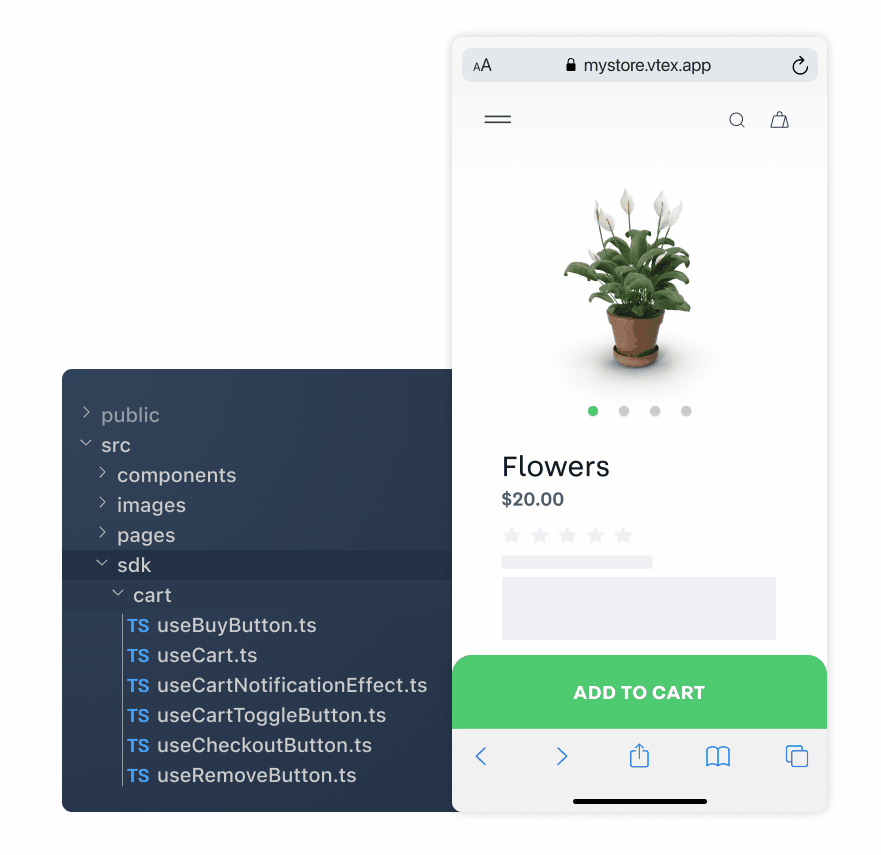
sdk
The sdk folder contains hooks responsible for controlling your application's logic and handling incoming URL requests to your store (e.g., adding or removing items from the cart).
For example, when someone sends a request to your web application using the Add to cart button, the useBuyButton.ts SDK will handle this request and update the appropriate states of your store.
Under the hood, the sdk folder works as a Controller between the Model and the View layers. After an SDK receives and treats a given input from the client, it sends commands to the View and Model layers. Commands sent to the View layer are responsible for updating user interface components, such as the number of items shown in the cart. Meanwhile, commands sent to the Model layer are used to update data and states of your store.
In summary, the sdk folder is responsible for controlling the application logic. Hence, if you ever need to write a custom business logic, this is the place where you should place your code.
Notice that, as a best practice, we recommend that you organize this folder using domain-specific subfolders the same way as with components.
Wrapping up
To wrap up how the src folder works, suppose you are creating a custom Campaign page for Black Friday.
To start, you would need to create a blackfriday.tsx file within src/pages/ to generate the https://mystore.vtex.app/blackfriday route and fetch static data.
Then, you could develop Campaign-specific React components, such as carousels and info cards, in the components/sections folder.
Then you would need to create a blackfriday/index.tsx file within views to develop your page's look and feel. In this file, we would import and bring together our recently created components/sections components, providing them with static data from src/pages/blackfriday.tsx and enriching them with dynamic attributes. Optionally, you could also develop new rules to handle SEO and include them in the blackfriday/index.tsx file.
Finally, you would need to import the src/views/blackfriday/index.tsx file into the src/pages/blackfriday.tsx file to render the page.